IC202 Education Station User Guide

IC202 Education Station User Guide
The location of items may vary from room to room, please take a moment to orientate yourself before starting.
- This room has a touch display screen and standard podium screen.
- Users can also use their device to connect to the display screen using the connections provided.
- You can connect your device using the HDMI connection provided.
- The lapel mic is for remote presentations and as the room is fairly small it is not for voice reinforcement.
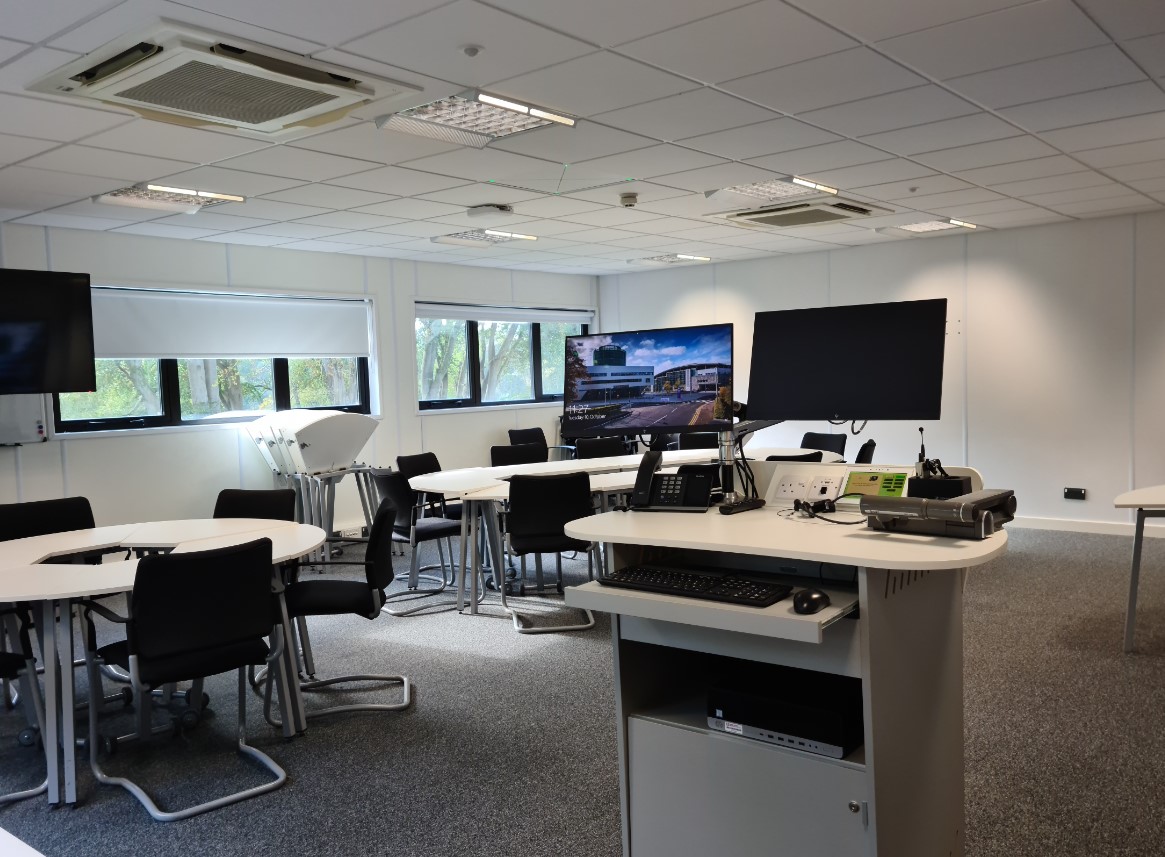 Education Station Podium layout
Turning the system on
Use the Control Panel to turn the system on.
Tap the display or select the ON button. It may take a moment to load.
If the touch panel is blank, touch anywhere to activate it.
Remember to turn OFF the Control Panel when leaving the room.
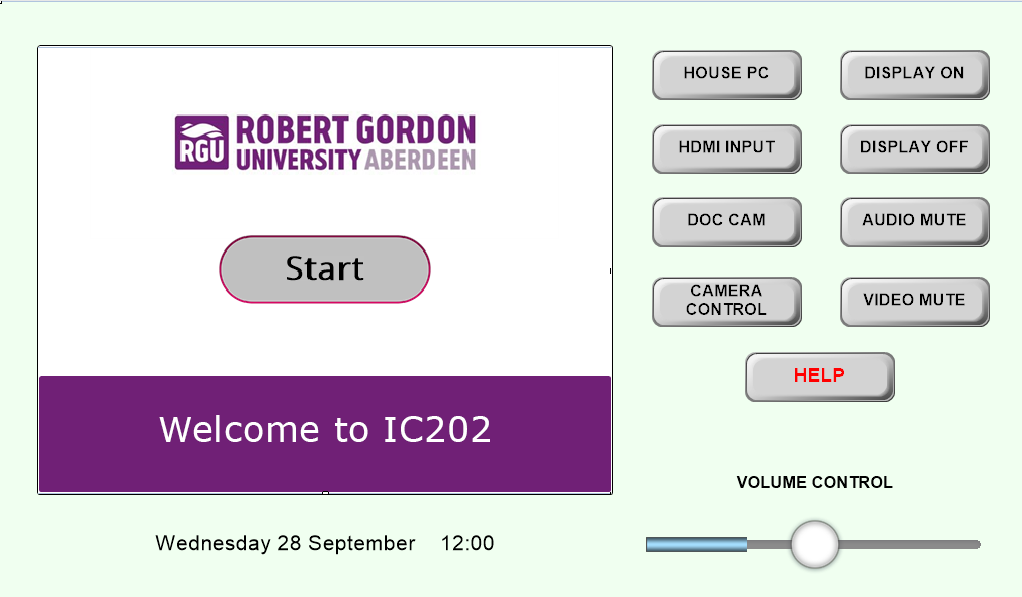 Control panel display after activation
Bring your own device
To connect your device to the display use the appropriate cable from those supplied, typically an HDMI or supplied adaptor.
Note: The in-room camera and mic are connected to the House PC only.
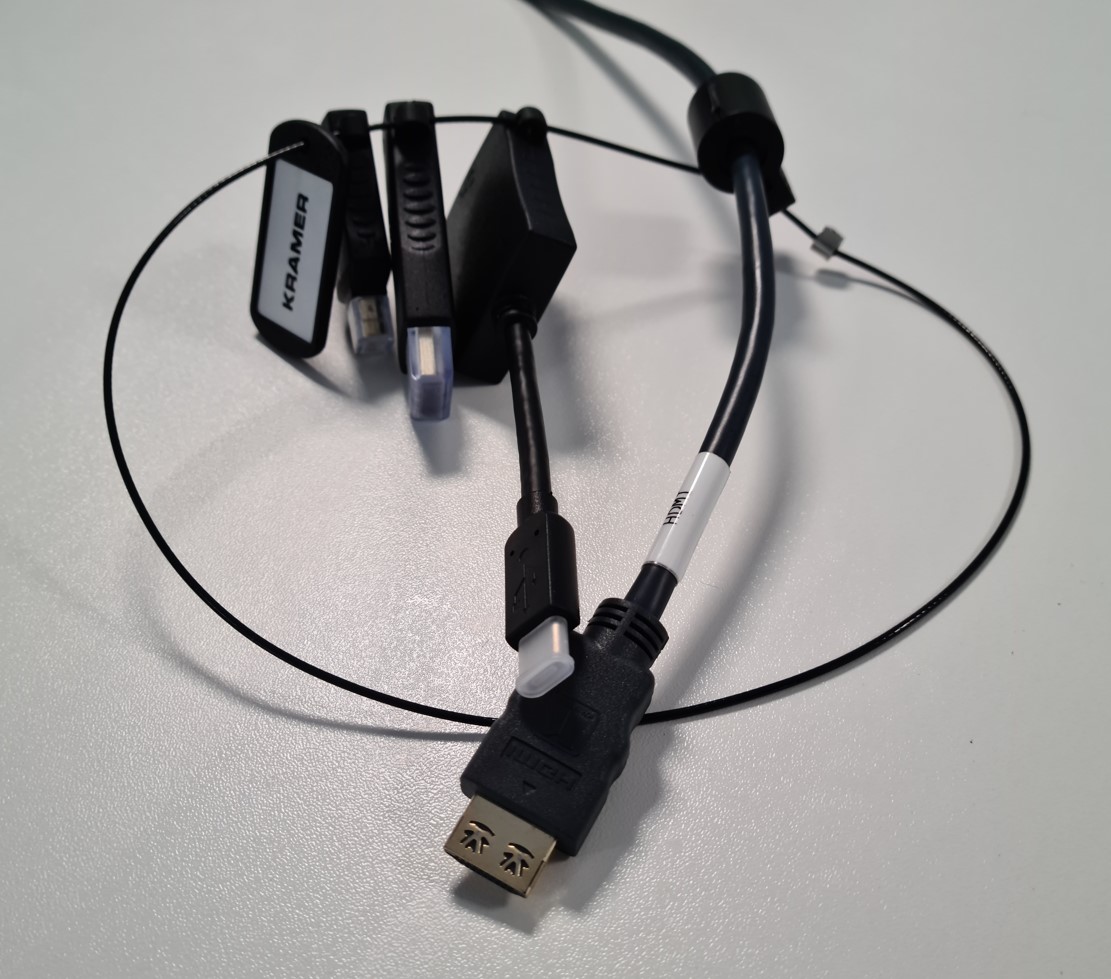 This room had HDMI and a series of adaptors
Display settings
The shortcut Windows Key + P will give you the option to choose a presentation display mode.
This shortcut can resolve ‘blue screen’ issues on start-up.
On a podium the right-hand monitor will be your extended screen and may be duplicated other screens within the room.
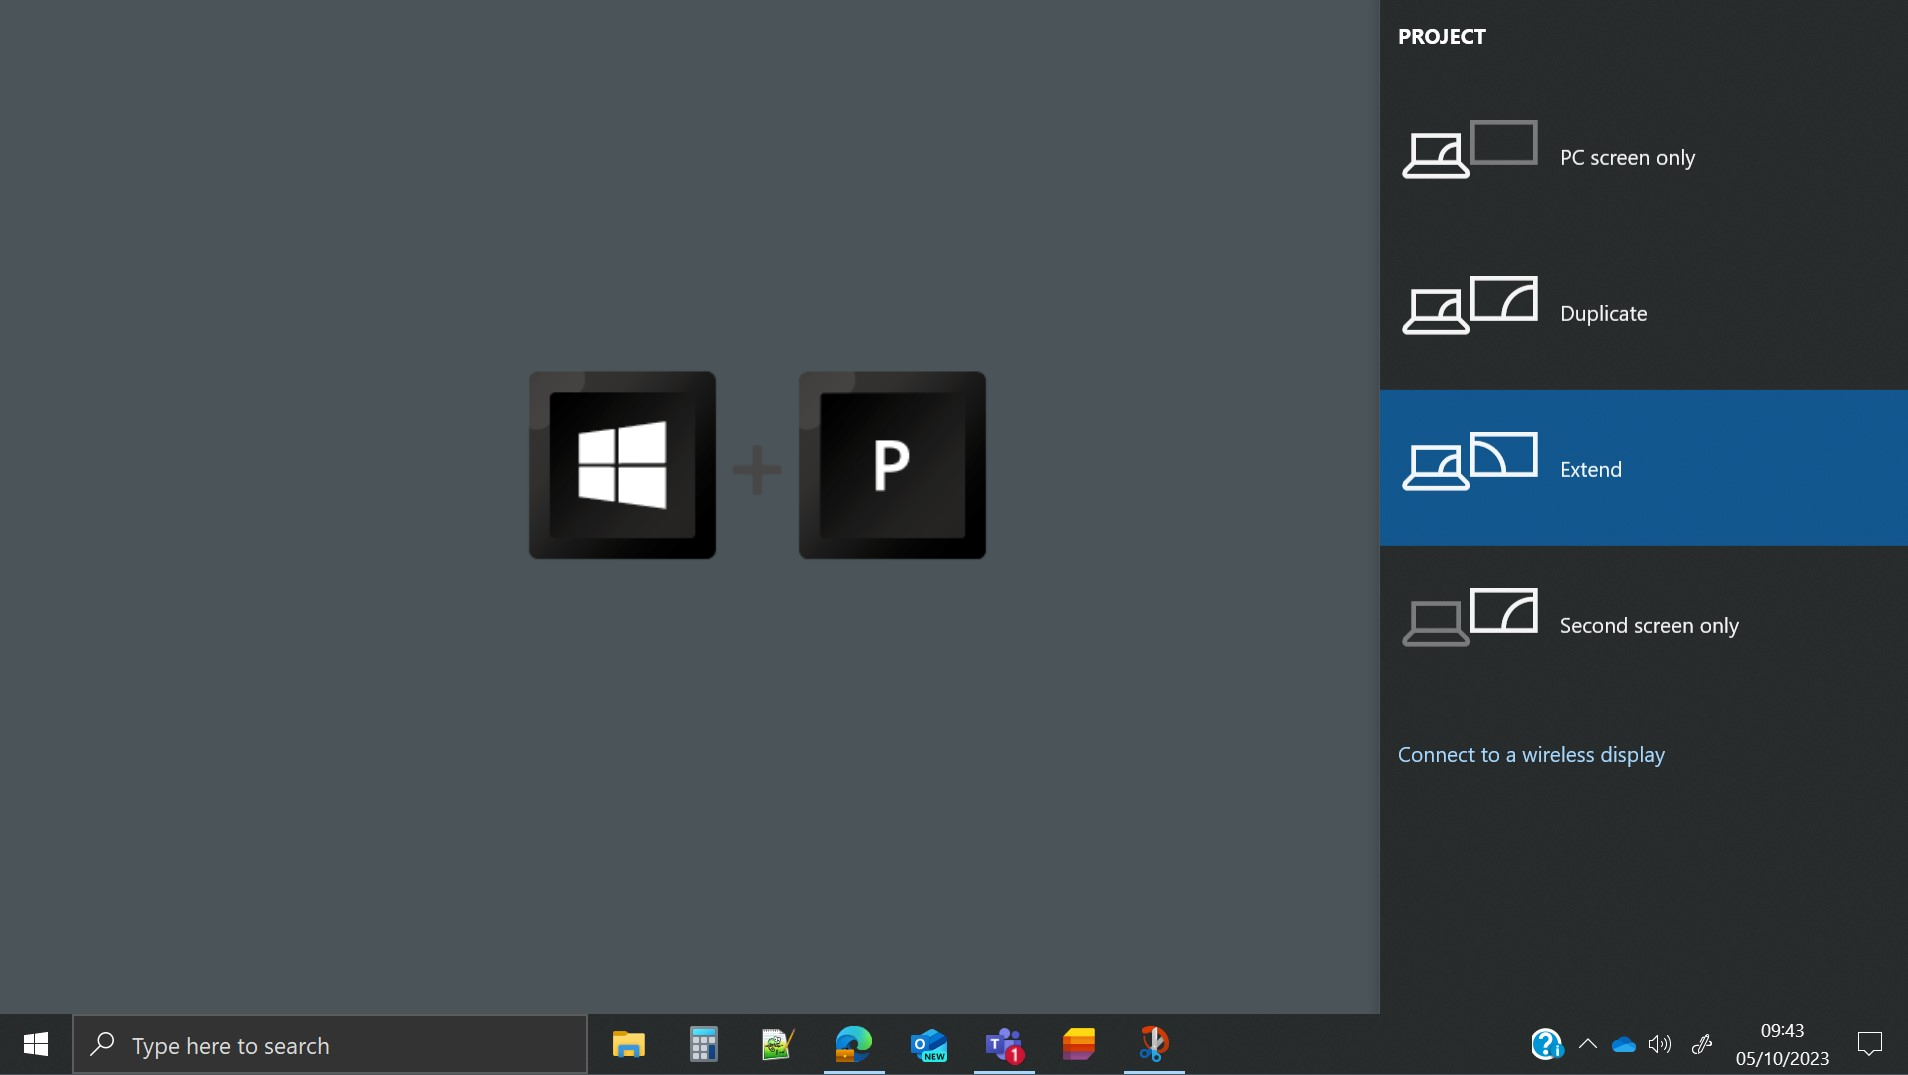 Desktop showing Windows + P control and sidebar ooptions
Camera Select
This screen allows users to decide which camera to control.
- Audience camera is facing audience above main display screen
-
Presenter camera is facing presenter in centre of room
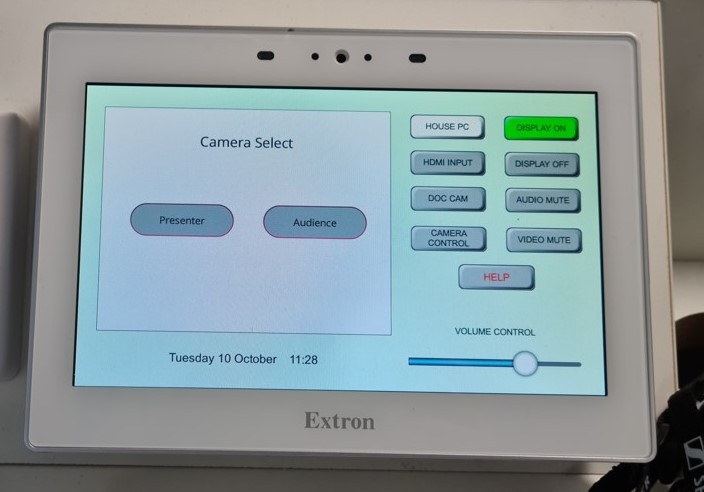 Chose from Presenter and Audience focused camera
Camera Controls
Here users can Pan/tilt, zoom and recall pre-determined camera pre-sets.
The Return button will return to the main page.
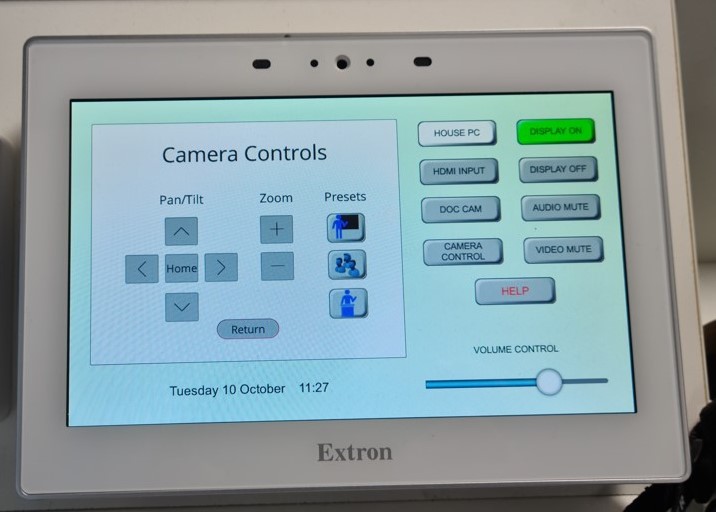 Camera controls should be adjusted prior to beginning
Microphone
Take a moment to identify which microphone is available in your room.
Examples include Boundary, USB, Lapel(pictured), Gooseneck, Webcam and Soundbar.
Return microphones to their charging dock after use.
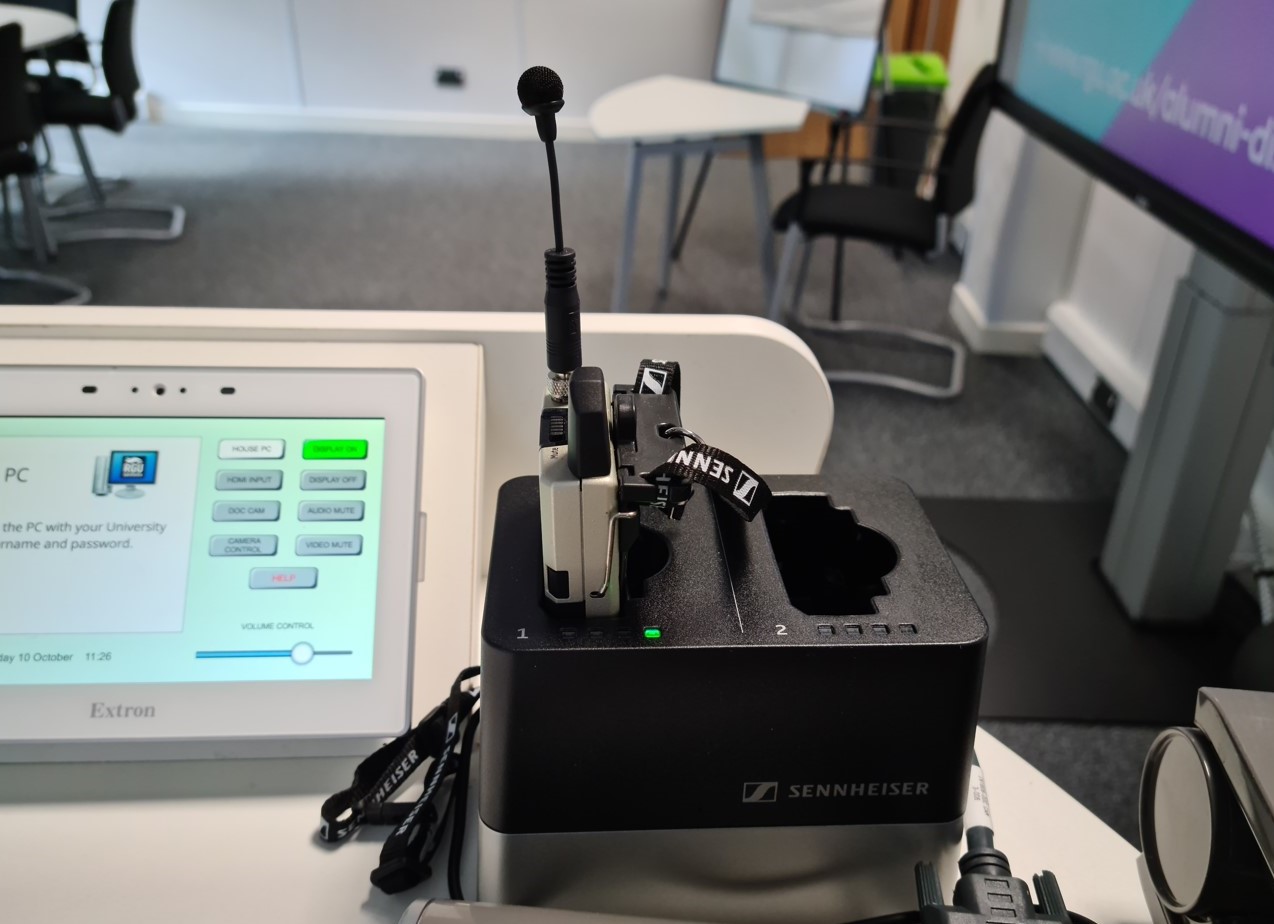 Wearable microphone
Using Apps (Teams, Panopto etc.)
You may need to check the setting menu to ensure you are using the in-room camera, microphone and speakers.
This is in the bottom right of the screen and resembles a speaker.
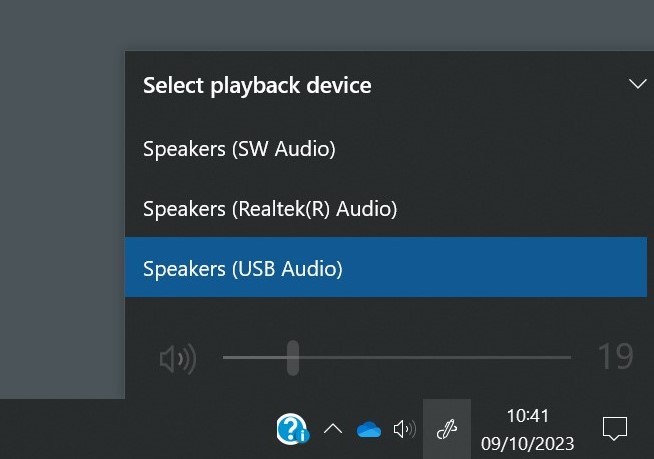 Check the audio output settings
To test App connection are working correctly use the Panopto Self View and Teams Test Call feature.
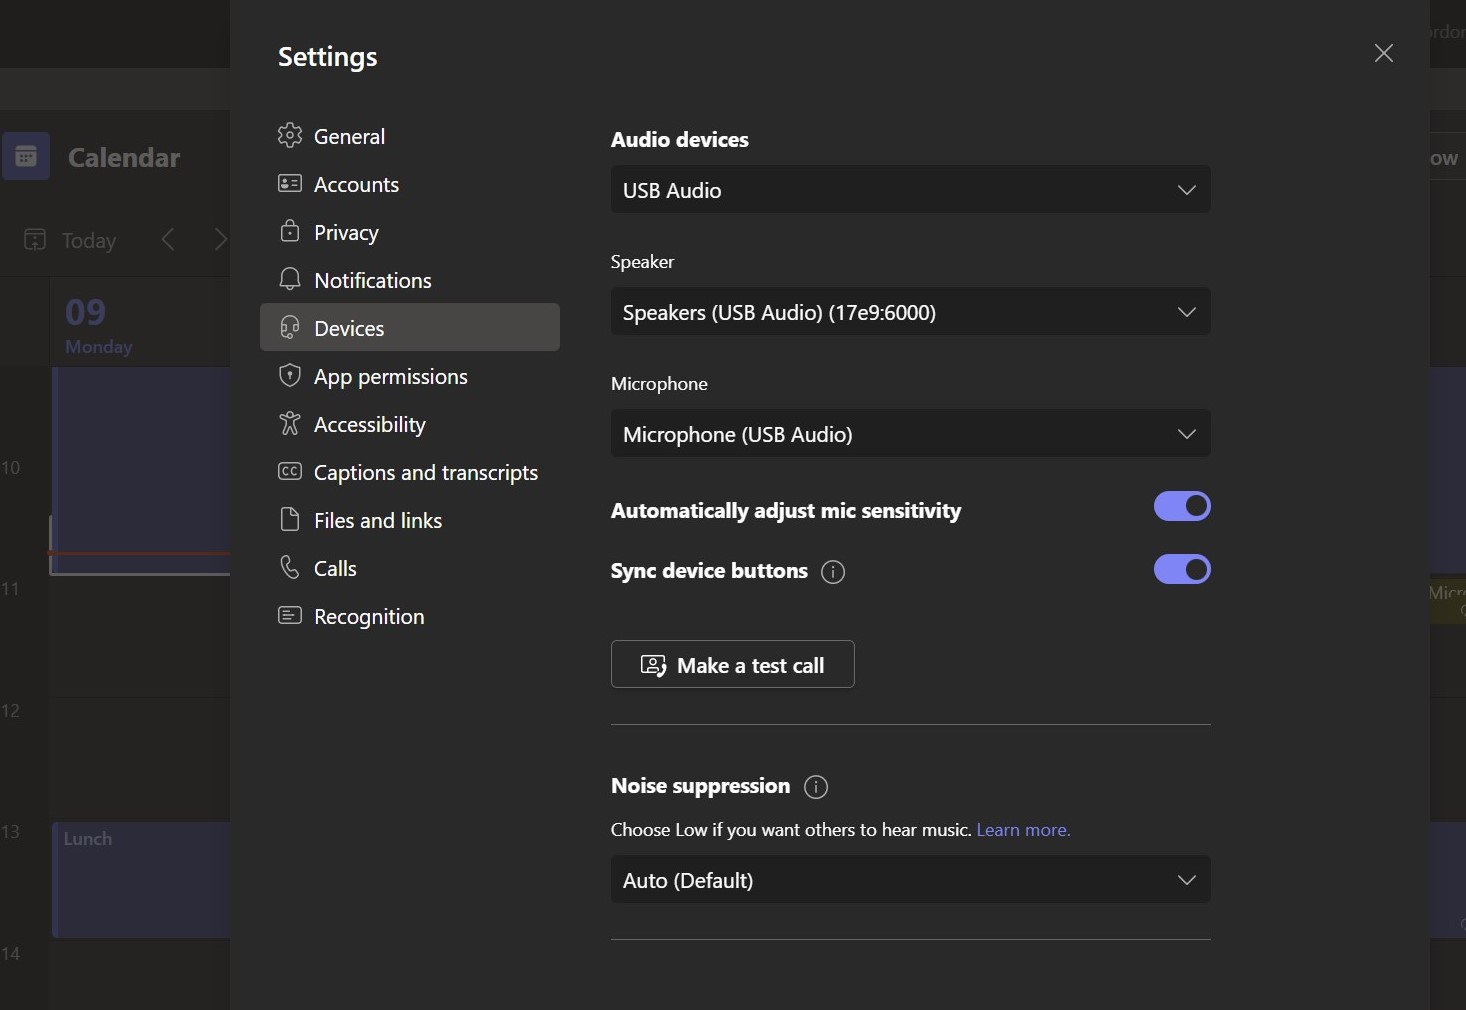 Making a test call in Teams
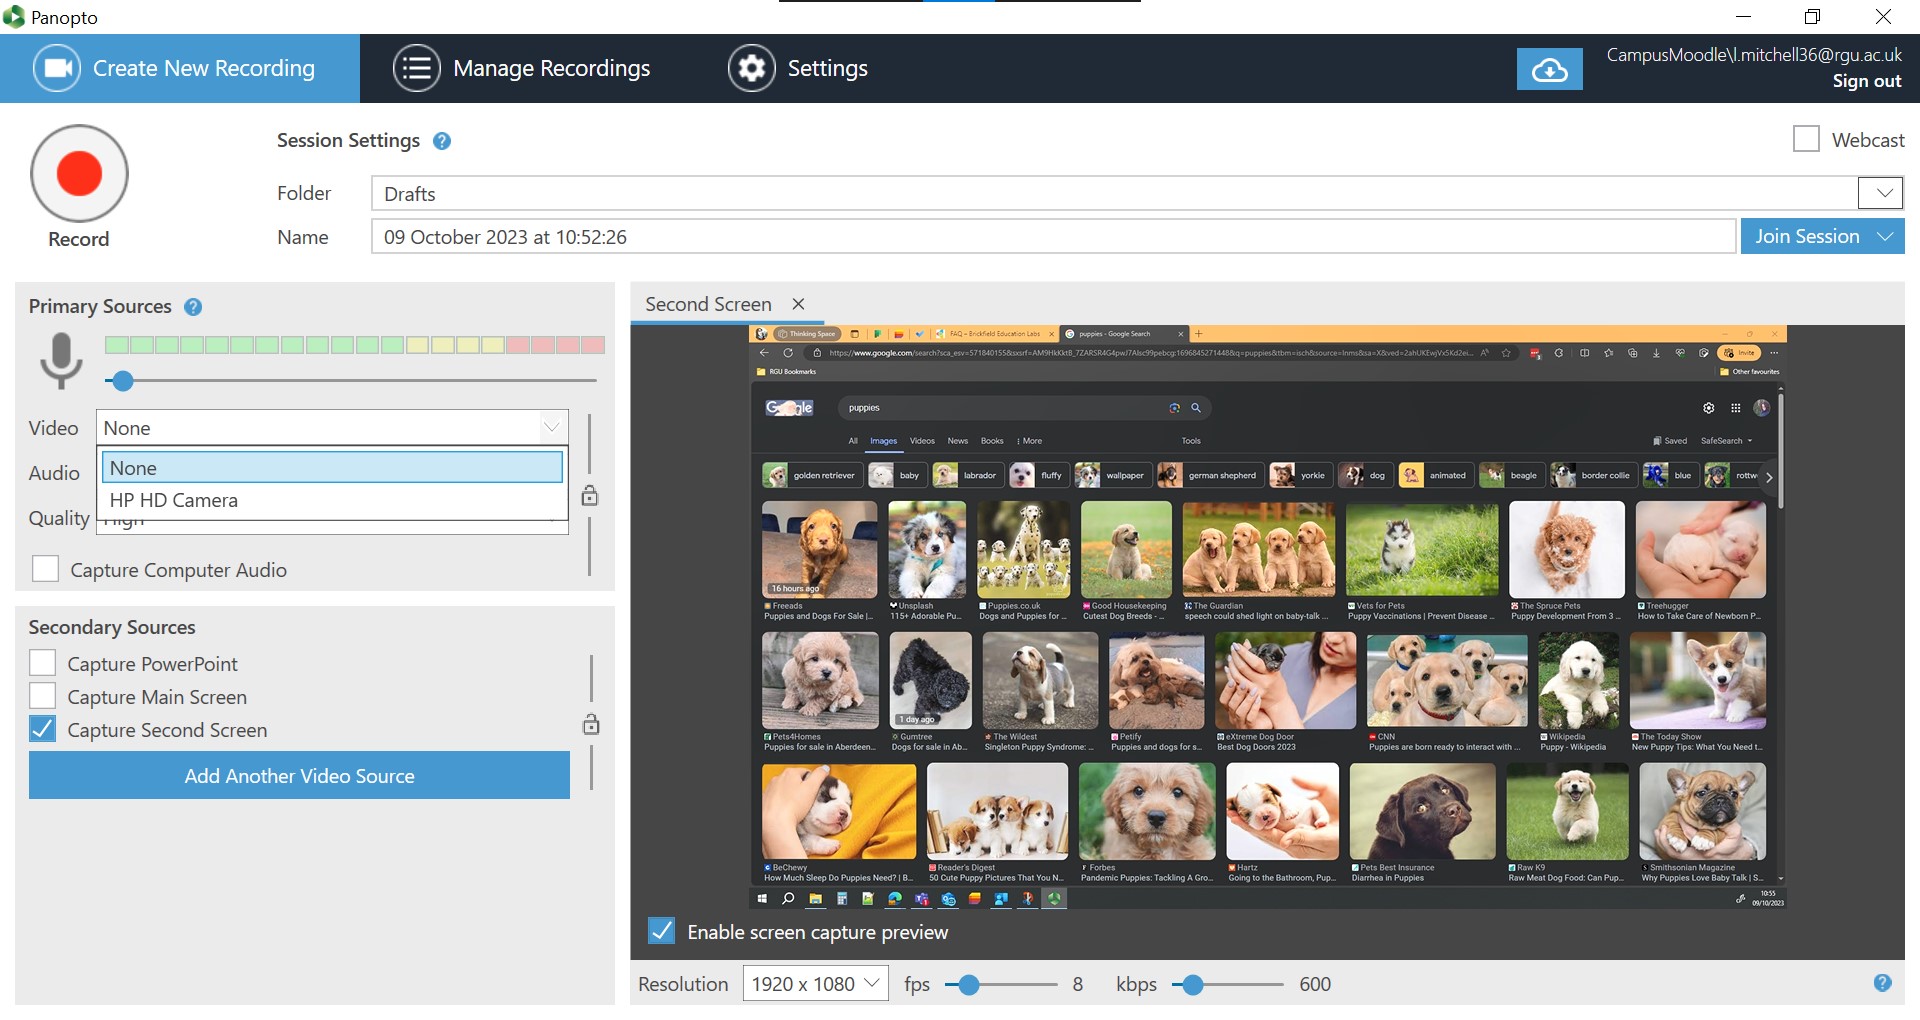 Use the screen capture preview to Panopto to see what will be recorded
Screen sharing
Participants must have the Bytello Share app on their device to use this feature. This can be accessed from:
- Company Portal [Laptop]
- RGU Apps [MAC]
- MyApps [Students]
Participants must enter the code from the display into the Bytello Share app to share their screens.
- Approval is required on the touchscreen.
Teams Phone
IC202 is equipped with a Microsoft Teams enabled phone for contacting support services and dialling in colleagues.
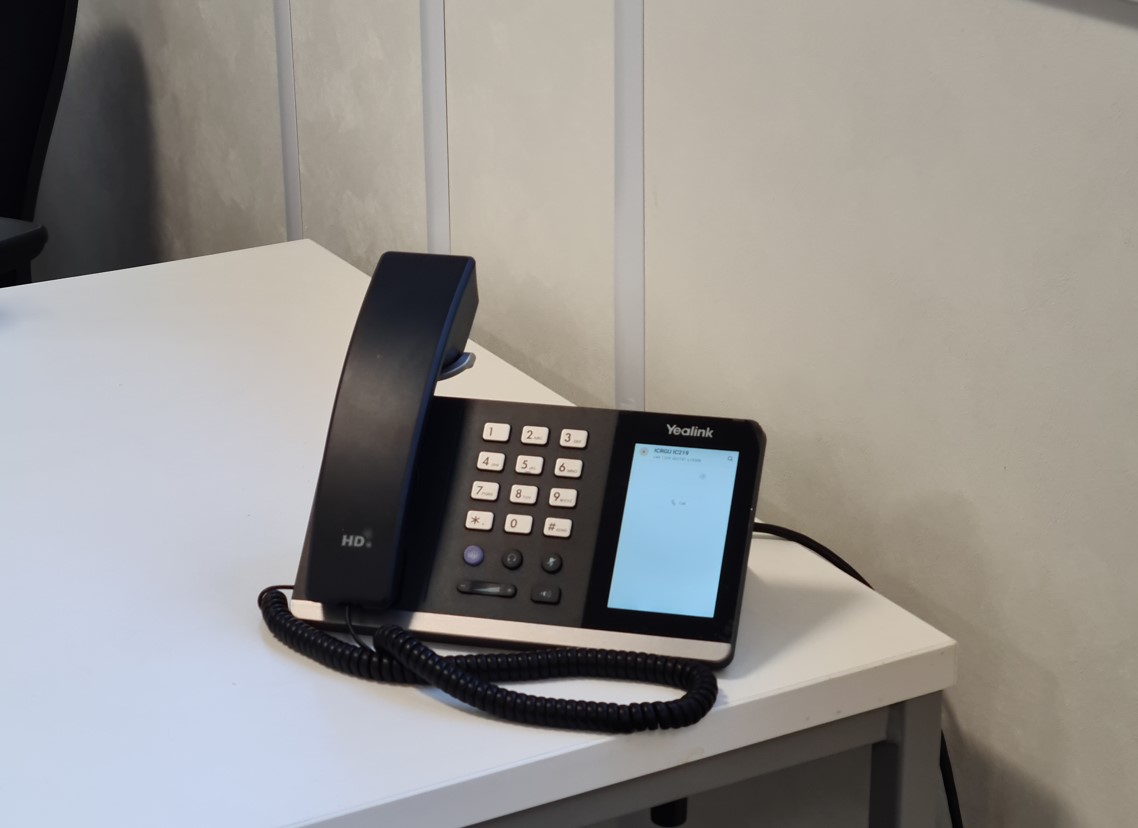 In-room Microsoft Teams enabled phone
Exiting the session
Use the Power Down / OFF button to shut down the system.